Monday, January 11, 2010

Carribean Turkey Burgers with Sweet Potato Fries!

For those of you who participated in the poll ..... I fully expect you to make these... AND COMMENT on them if you like them or hate them. And I quote my husband... "These are the best turkey burgers I've ever had." That's right! So get your shopping list out and lets get to it.

These are HEALTHY burgers, HEALTHY fries, and I cooked up some of our favorite green beans (easiest recipe you'll ever find). This beats fast food calories every day of the week! (Scroll to the bottom to see the final plate!)


Carribean Turkey Burgers
  • 1/2 cup dry bread crumbs
  • 3 tablespoons chopped green onions
  • 1.5 tablespoons dried parsley 
  • 2 tablespoons Worcestershire sauce
  • 1 tablespoon Caribbean jerk seasoning
  • 1/2 teaspoon salt
  • 1 pound LEAN ground turkey
  • 1 teaspoon olive oil
 Optionals:
  • 4 whole wheat hamburger buns, split
  • 4 lettuce leaves
  • 1 medium mango, peeled and sliced (I took this option!)
  • 4 (1/4 inch thick) rings sweet red pepper (I took this option!)
Combine all ingredients in a bowl and mix together WELL. Form meat mixture into a large ball. Divide into 4 equal parts, 6 equal parts, or 8 equal parts. I chose 6- and it made pretty small patties. You'll want to press down the patties to about 1/2" thickness.
Saute olive oil over medium-high heat and cook burgers about 5 minutes per side or until juices run clear.


Once they are ready, get whatever toppings you chose ready and doll them up. I just did a red pepper ring with a mango slice


If you want to make sweet potato fries and green beans, keep reading, and don't miss the final plate at the bottom!!

Baked Sweet Potato Fries:

3-4 sweet potatoes
Cooking Spray
Cumin
Chili Powder
Ground Red Pepper
Paprika
Salt

Preheat your oven to 425
Spray baking sheets (I needed 2 for how many fries I made)
Cut your potatoes in half (short-way, not the length)
Then cut them in half again (long way)
Place cut side down and start slicing small fry shapes, or you could go for wedges

Once sliced, place in a single layer on the baking sheet(s). Spray cooking spray over the fries to coat them. Sprinkle all spices over. (I probably used about 1tsp of each, maybe less of the red pepper!)

Bake on the bottom rack 20 minutes, then move to the top rack for 10. You'll want to watch them CONSTANTLY. They will go from perfect to burned to a crisp quickly depending on the heat your oven puts out. Just monitor and taste test! You'll know when they are ready!

Easy Almond Green Beans

1 16 oz bag of frozen green beans
(If you can get them from Trader Joes, I highly recommend doing so!)
1/4 cup sliced almonds

Heat a dry skillet over medium heat. Toast almonds, stirring constantly until browned. Remove and set aside.
Add a couple of tablespoons of water to the skillet. Bring to a boil (This should happen almost immediately after cooking almonds). Add frozen beans.
Cover, and cook 10-12 minutes. Drain, toss with almonds and serve immediately.

We have this anywhere from 1-2 times a week. NO LIE. Add some salt and pepper at the table, and enjoy! (We also add spray butter!)

So here was the final plating of the meal. So much better than a fast food burger! You felt GOOD after you ate it, not guilty! So please try these and ENJOY them! They are guilt-free!



Wednesday, January 6, 2010

Red Cheesy Chicken Enchiladas

So, Nick had asked that I make some enchiladas awhile back. My sister-in-law recommended the ones out of a cook book that both she and Nick have copies of. It's called Eating For Life. While I followed this recipe for the most part, I did add some of my own stuff, and will make a few suggestions for those of you who want to test it out!


Cheesy Chicken Enchiladas
1 pound of chicken breast (a little over a pound wouldn't hurt)
4 green onions, chopped
1 jalepenio, seeded and minced
(The recipe called for fresh cilantro, but I forgot about it, so my recipe didn't have cilantro)
10 Whole Wheat Tortillas
(Recipe calls for corn tortillas, use what you want!)
3- 10oz cans Enchilada Sauce
(I used Red, the recipe calls for Green)
1 Cup Skim Cheddar Cheese

Optional Toppings:
*Yes, I said optional, but I HIGHLY RECOMMEND ALL OF THEM!*
Shredded Lettuce to place under enchiladas when serving
Reduced Fat Sour Cream
Sliced Black Olives
Chopped Fresh Tomatoes

Directions:
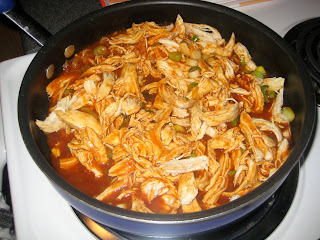
Place Chicken in a large pot, cover with water. Bring to a boil, reduce heat, and simmer 15 minutes, until insides are no longer pink. Drain, cool slightly, and start to shred with 2 forks.

You may want to start pre-heating your oven at this point to 350.


Spray a large saute pan with cooking spray. Add the green onions and jalepeno. If using cilantro, add it here. (I would also suggest possibly dicing up some onion, throwing it in here, maybe put some frozen corn in at this point as well. I didn't do either THIS time) After about 2-3 minutes, add your chicken to the pan.


At this point, pour 2 cans of enchilada sauce in a microwave safe bowl, and heat in the microwave for 2 minutes.
While that is heating, pour remaining can of sauce over chicken mixture.


Allow to simmer together and really season up the chicken.

NOW. Prepare to get messy, but if you prepare ahead of time, not too messy!

1. Spray a 9X13 baking dish with cooking spray
2. Have the dish VERY NEAR the chicken mixture
3. Have the bowl of sauce VERY NEAR the chicken mixture

Ready? Here we go.

Dip a tortilla in the warm bowl of sauce.
Place in baking dish
Add a scoop of chicken on one end, and roll up.
Turn seam side down in the pan.
REPEAT. 9 TIMES!

Pour remaining warm sauce over enchiladas


Now, sprinkle with A LOT of cheese. Yes, the recipe says 1 cup, but please don't actually measure out a cup. JUST PUT IT ON THERE THE WAY YOU LIKE IT!


Does that look good or what? Pop it in the oven for just 15 minutes.......


And you get some super-cheesy, super-healthy, and super-tasty enchiladas! We went nuts over them!

Place some shredded lettuce on each plate, and serve up the enchies!


 Nick's Plate

(Not a good shot of the lettuce underneath due to the flash, BUT- good shot of those enchiladas!)

I need to work on my food photography!


My plate


ENJOY! Of course, I made the Ultimate Spanish Rice to tag along with this meal. Go find it in the blog if you don't know what I'm talking about by now!

Tuesday, January 5, 2010

Healthy Baked Chicken Parmesan

So, this is an oldie, but a keeper! Its the classic Italian favorite: CHICKEN PARMESAN: turned low fat and low calorie. It beefs up the fiber by serving it atop whole wheat pasta, and you'll get a good serving of protein out of strictly meat and healthy cheeses. I PROMISE, you won't miss the taste of that deep friend Italian restaurant Chicken Parm.

Here's the recipe. Its easy, and its cheap! I do have a couple other recipes for healthy chicken parmesan, but if you are budget-wise, choose this one!

Note: There are a lot of spices listed for flavoring the chicken, if you don't have them, don't rush out and buy them, I'll make some suggestions later on in the directions!

Chicken Parmesan:

1 pound of chicken breasts (3-4)
Garlic Powder
Salt
Pepper
Ground Red Pepper
Italian Seasonings
(You can use a pre-made packet, or just use some dried basil, parsley, and oregano)
2 Cups Spaghetti Sauce (I used Classico Italian)
1/2 cup Mozzarella Cheese (I use part skim)
1/2 cup Grated Parmesan Cheese
8-10 ounces Whole Wheat Pasta (penne, spaghetti, doesn't matter!)


Directions:

1. Preheat your oven to 375

2. Meanwhile, coat the bottom of a shallow baking dish with cooking spray. Lay your chicken pieces in the pan. Sprinkle the tops with a little of the garlic powder, red pepper, salt, pepper, and italian seasoning. Flip them over and do the same thing to the other side.

*Garlic salt or garlic pepper would work fine in place of garlic powder. Basil, oregano, and parsley would all work instead of an actual "Italian Seasoning" spice or packet. If all else fails, just use some salt and pepper!

3. Pour/spoon the spaghetti sauce over top of each breast so that they are covered. DON'T GO EASY ON THIS! The more sauce, the better!

4. Pop them in the oven for 45 minutes.

5. Near the end of their baking time, start boiling water for your pasta. Cook according to box directions.

6. Once the chicken is done, remove from the oven. Top each breast with a little mozzarella and a little parmesan, then bake for 5 more minutes or until cheese is melted and bubbly!

7. Remove and serve immediately over the pasta. Top with more grated parmesan and some of the sauce from the baking dish!

ENJOY! Its delicious!


Monday, December 14, 2009

Taco Soup and Homemade Corn Bread Muffins :)

This is an EASY, CHEAP, and delicious combination! Healthy cornbread, and healthy taco soup! PERFECT for a cold and rainy day! (Or foggy like today!)


First, the Taco Soup

Nick got this recipe from Brittany at his office. Brittany, if you're reading this, thank you!!


Whatcha need:

1 lb ground turkey (Yes, you could use beef or chicken!)
1 packet taco seasoning
1 packet dry ranch seasoning (Hidden Valley)
1 can Original Rotel
1 can Petite Diced Tomatoes, rinsed and drained
1 can black beans, rinsed and drained
1 can pinto beans, rinsed and drained
1 can chicken broth
1 can yellow corn, rinsed and drained

Optionals:
Any kind of cheese for sprinkling
You could get sour cream if you want
Tortilla tips to crush over the top

Really, there isn't much to the instructions.

Brown your meat in some olive oil (I seasoned the meat with cumin, chili powder in salt, but you don't have to)


Then, add your taco mix and ranch seasoning:


Now, add everything else!


Let this simmer as long as you'd like. Meanwhile.... why don't you make some cornbread!?

Healthy Whole Wheat Honey Corn Bread


Whatcha need:

1 1/4 cup whole wheat flour
3/4 cup cornmeal
1/2 t baking soda
1/2 t salt
2 t Olive Oil
2 t Honey
1 egg
1 1/2 cup buttermilk

Mix your batter JUST until all is combined, don't over-mix or you risk dry bread!

Heap about 2 spoonfulls of mix into muffin tins (or a bread pan if you rather)

Pop in the oven at 450 degrees

In they go.....


Cook them about 12-15 minutes (watching them constantly after the 10 minute mark) until they are done and a toothpick inserted comes out clean.

Try to get them out of the pan/muffin tins as soon as possible to prevent them from continuing to cook.

Immediately wrap them in foil and keep warm for up to 3 hours until ready to serve with the soup.


Thats it! Dress up your soup, add a cornbread muffin, and enjoy :)


We sure did!

Saturday, December 12, 2009

Chai Spiced Buttermilk Pancakes!

I found this recipe on tastykitchen.com. As soon as I saw the title, I knew i needed to make these pancakes! Unfortunately, I didn't get an awesome picture for you that will make you NEED to try them the way I did, but, hopefully you trust me enough as a "Chef-Wannabe" that you'll know I wouldn't post a recipe on here if it wasn't good!

Ingredients:

2 eggs, beaten
1.5 cups buttermilk
1/2 cup brewed chai tea
1/2 t vanilla extract

Mix these wet ingredients together in a large bowl. Once blended, add the following:

2 cups of all purpose flour (I used whole wheat b/c it was all I had!)
3 T Sugar
2 t Baking Powder
1 t Baking Soda
3/4 t Cinnamon
A pinch of cloves
1/8 t ground black pepper
1 t salt

Allow batter to sit, and thicken, about 3 minutes. Preheat your griddle, or skillet. I also preheat my oven to about 170 when I make pancakes so that they can sit in there and stay warm!

Pour one ladle of batter into the skillet and wait for bubbles to form at the top of the pancake. Flip, and cook until golden brown. Repeat until batter is gone.

I ended up making about 6 large pancakes. But you could probably make any number you want depending on the size!

Add butter, syrup, or honey, and enjoy :)


Thursday, December 10, 2009

ITS ABOUT TIME: MEXICAN LASAGNA!

For those of you who know me pretty well, you know that one of the staples in my cooking repertoire is Rachael Ray's famous Mexican Lasagna. This meal is fail-proof. I mean that. There is no special trick. You just layer a bunch of Mexican goodness and come out with a cheesy, delicious dinner! Try it, you won't be sorry. I prefer to serve Mexican Rice with this dish. Try out The Ultimate Mexican Rice earlier on this blog. GOOD MATCH!

Another thing- this meal is pretty healty. You can choose low carb/low fat tortillas, and skim cheese, and you've got a well rounded, HEALTHY meal. See for yourself!


Ingredients:
2 pounds of lean ground turkey (you could use ground chicken or ground beef as well)
2 T Olive Oil
1/2 large red onion, chopped
2 T Chili Powder
2 t Cumin

1 cup Frozen Corn Kernels (I prefer yellow over white for this recipe)
1 can black beans (drained)
1 cup taco sauce or 14 oz of stewed or FIRE ROASTED tomatoes! *I use taco sauce*
Salt to taste
8- 8'' whole wheat, or spinach tortillas *I prefer spinach tortillas, but used wheat this time*
2 1/2 cups shredded mexican or cheddar cheese (I use part skim)

Here we go. Don't blink, its so easy.
Preheat oven to 425 degrees.

1. In a LARGE skillet, brown the turkey in the oil with the onions, chili powder, and cumin until turkey is no longer pink
2. Add corn, taco sauce, and beans. Salt to taste.
3. Once it has simmered about 3-5 minutes and warmed through, you're ready to layer.
4. Quarter your tortillas into wedges.
5. In a 9X13 pan, put a layer of the turkey mixture. Top with tortillas. Top those with cheese. Another layer of meat, tortillas, top with cheese. I usually only do 2 layers, but do whatever you have room for!
6. Bake 12-15 minutes in the oven until cheese is brown and bubbly.


Cut it up and serve it. I found a new trick for slicing it. PIZZA CUTTER. It worked SO well. Cut right through the tortillas and cheese without ruining the layers!

ALSO: If you have 2- 10X10 dishes, try following the recipe and making it in two separate pans. Put one in the oven, cover the second and put it in the freezer for future recipes! Especially if there are only 2 of you at home! That way, you just take it out one day, pop it in the oven for probably 30-45 minutes and its ready to go without all the prep work! ENJOY!

Monday, December 7, 2009

Slow Cooked Italian Chops!

Today I slow cooked some pork chops all day in some Italian homemade sauce. Pretty good if I do say so myself. The pork FALLS apart, and it requires minimum, CHEAP ingredients. EVEN THE PORK was on sale at Kroger!

I'll post the recipe at the bottom! Go through the cooking method with me first!

1. Salt and pepper 4 boneless, lean, pork chops. Brown in 1T of Olive Oil, about 3 minutes per side, in a skillet. Transfer to Slow Cooker


Now, in the SAME pan you started the pork in, saute a chopped onion, a minced clove of garlic, and 8 oz of mushrooms for about 2 minutes, just until they start to soften.


Now, add your veggies on top of your pork in the slow cooker.


At this point, take about 1/4 cup of the white COOKING wine and deglaze the skillet, pour wine and scrapings over the veggies.

Now, make your sauce to go on top in a separate bowl by combining 2-8oz cans of tomato sauce, the juice of half of a lemon, 1/2 t salt, 1/2 t basil, 1/2 t oregano, and 1/2 t parsley.


Now, pour the sauce over the pork and veggies.

Here is your BEFORE picture


Let that cook about 8 hours on low


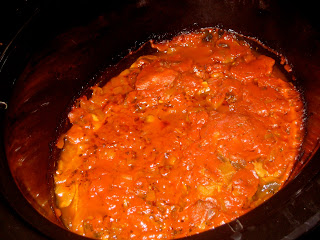
And then you'll get to walk in the door, after a long day of work to not only the aroma of the pork cooking in the spices, but this beautiful AFTER picture as well:


All you have left to do is cook up some spaghetti to serve it over and get out some parmesan cheese to top it off!


SOOOOOOO GOOD! We really enjoyed it, and i hope you will too! Just give it a try. A little work in the morning (less than 20 minutes) and a lotta work for the slow cooker all day long!

Ingredients:
4 lean, boneless pork chops
1 T EVOO
Salt and Pepper to season pork
1 onion, diced
1 clove of garlic, minced
8 oz sliced mushrooms
1/4 cup white cooking wine (dry)- cheaper than the real deal ;)
1/2 t salt
1/2 t oregano
1/2 t parsley
1/2 basil
2- 8oz cans tomato sauce
Juice of half of a lemon

(Spaghetti to serve it over!) I hope I didn't leave anything out, but everything should be in the instructions as well :)